How to Set Case Priority in Salesforce based on Email Importance / Priority
I’m not a huge fan of the often misused email priority flag, but people use it and expect that it will be noticed when contacting customer service via email.
Salesforce doesn’t flag cases by default, but it can be achieved by examining email headers with Salesforce workflow and then using a field update on Case Priority. Email headers are not captured by default, and before you enable them, consider the data storage implications.
In Salesforce, most records consume a “flat rate” of 2KB, or in some cases 4KB of storage. The Email Message object is the only object for which the true byte count is measured against your data storage limit. The problem with capturing email headers using Email-to-Case (standard) is that it is all or nothing, and “all” consumes a ton of data storage, which can quickly put you up against your data storage limit. For more details, see the “Doing the Math” section of my related Solving the Spam Problem post.
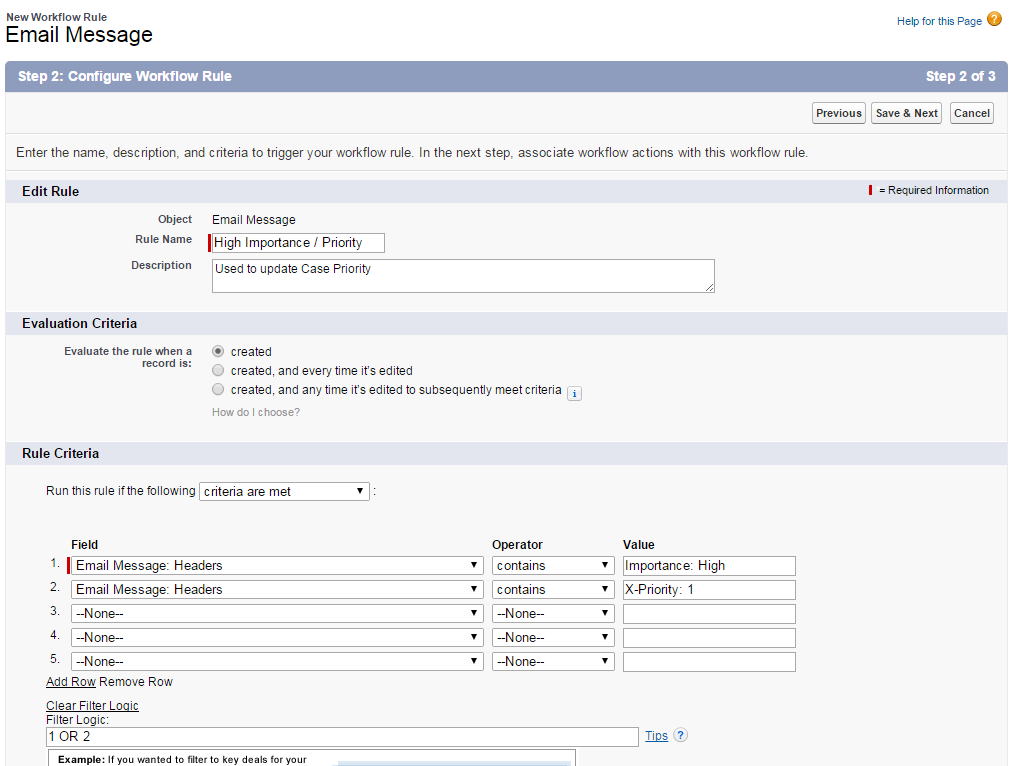
The email header varies by the sending email client, but Importance is most widely used today. Microsoft has a good write up of the variations.
Importance (High, Normal, Low)
Priority (Urgent, Normal, Non-Urgent)
X-Priority (1 = High, 3 = Medium, 5 = Low)
X-MSMail-Priority (1 = High, 3 = Medium, 5 = Low)
Email to Case Premium makes it easy to define which headers to capture, thereby conserving data storage and allowing Salesforce Workflow to evaluate the email headers.
1. Configure Salesforce to capture email headers. In Email to Case Premium, navigate to the Inbound Configuration page. Email-to-Case (standard) instructions can be found here.
2. Create a Workflow Rule on the Email Message object. Don’t forget to set the filter logic to OR if you are configuring for more than one header.
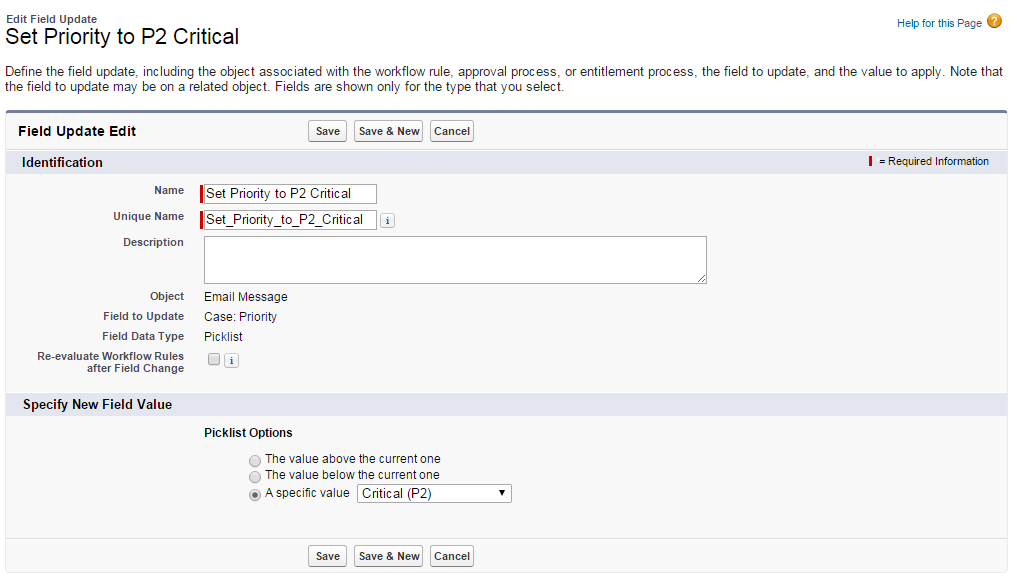
3. Create a Field Update and then activate the Workflow Rule.
- 5 Ways We Invest in Employee Happiness - March 1, 2018
- How to SetCase Priority in Salesforce based on Email Importance / Priority - April 10, 2015
- How to Reduce Customer Effort - October 7, 2014

