Facebook Advertising for Brand Pages – The Basics
Today more businesses are using Facebook in their social media strategies than any other network. A report last June from InSites Consulting surveying 1,222 company managers around the world showed that 80 percent of American companies are on Facebook, compared to just 45 percent that have a Twitter account. If Facebook’s current growth rate continues, 2 billion users will be reached by the end of 2014.
Advertising your brand on Facebook is a great way to increase your fan base, find potential customers, gain immediate feedback, and stay a step ahead of your competition.
Facebook announced many changes to their advertising platform in the past year, and if you’re new to Facebook advertising (or haven’t created an ad campaign in a while) it could be a bit overwhelming at first glance. I’d like to explain some of the new features available to you as a brand page owner, as well as go over how to start your first ad campaign.
Getting Started
To get started, log on to Facebook and go to your brands’ page. On the top right click the drop down arrow where it says “build audience”, then click “create and ad”. The first option you are faced with is the destination of your ad. You can choose to have your advertisement linked to an external URL (your website) or your Facebook brand page. The objective here is to increase our fan base so we will choose our brand page as the destination.
After your brand page is selected as the destination, there will be three options to choose from:
1. Get More Page Likes
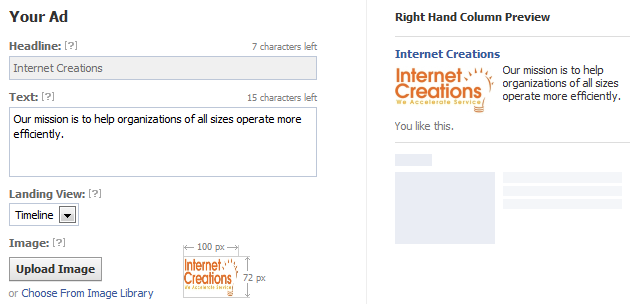
If you’ve created a Facebook ad in the past, this option should look familiar. This is the standard option that will allow you to create the body text and choose an image for the ad. A preview will be shown in the right hand column as you type. The headline will always be your brand page name and this cannot be altered. The default image of the advertisement will be your brand pages profile picture, but you can also choose to upload a different image if you wish. Uploaded images will display at 100 x 72 pixels, and it is recommended to fill the entire area. The ad text can be a maximum of 90 characters.
The landing view will automatically have “timeline” selected. This is the default page that a user will land on after they click your advertisement. If you click the drop down arrow, you will be able to select a custom tab for user to land on. Leave timeline selected for now and I’ll go over how to better utilize this landing view feature in my next post.
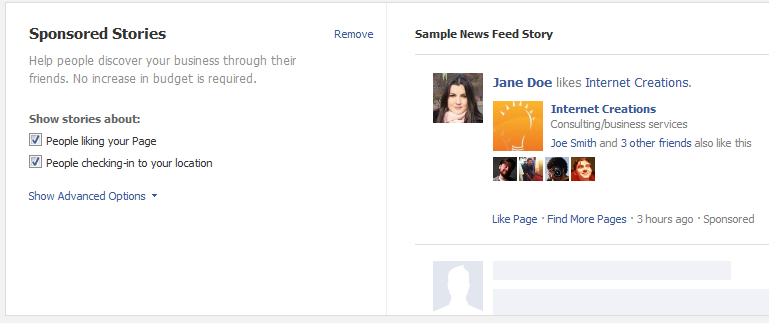
Directly below, Sponsored Stories will automatically be created unless they are deselected. Just like creating an ad above, you will also see a preview of the sponsored story on the right hand side. If you also choose to run a sponsored story, the budget will be shared with whatever you set in the pricing section below. Here you can choose the sponsored story to be shown to friends of the users who liked your page or have checked-in to your location.
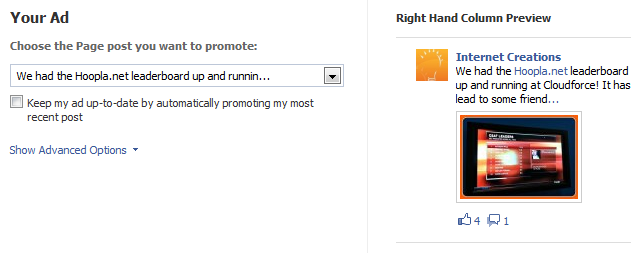
2. Promote Page Posts
The new Promoted Posts feature allows companies that run brand pages to post their content to the news feed of users who aren’t fans of their page. This feature is similar to Twitter’s Promoted Tweets.
If you choose this option you’ll be able to select a specific post from your page, or automatically promote your most recent post. Automatically promoting your most recent post will eliminate the need to return to the ad’s create tool every time you want to promote a new post.
The sponsored stories will again be automatically selected. However, the options will be different. Friends of the people who have taken any of these actions are eligible to see this story if they are in your target audience.
- People liking your Page post
- People commenting on your Page post
- People sharing your Page post
3. See Advanced Options
The Advanced Options will allow you to see all creative and bidding options. The default bidding option is CPM (Cost Per 1,000 Impressions), If you wish to change your bidding options between CPM and CPC (Cost Per Click), this option will allow that.
Choose your audience
- Choose the location, age range, and gender of the users you would like to target.
- Selecting a precise interest with no hashtag will target users who expressed that specific interest.
- Selecting an interest marked with a # will target users who have interests tightly related to the selected term.
- If you choose to target using a broad category, it will be shown to people who’ve included information in their timelines relevant to that category.
Campaign, Pricing, and Schedule
The final step is to set your budget. Enter in a campaign name and the maximum amount you want to pay per day. Next you can choose to start your campaign continuously today, or select a specific date range. Finally you have to set your bid. The pricing system works by placing a bid to tell Facebook how much you are willing to pay per click (CPC), or per thousand impressions (CPM). You will typically pay less than the suggested bid, but Facebook can charge you any price up to your maximum bid.
Achieving a high click through rate (CTR) is the most important part in getting a lower CPC for your Campaigns. It shows Facebook that your ads are actually improving the users experience, not taking away from it. This is why targeting the right audience, having images that grab the readers’ attention, and having compelling ad copy are essential to get the most out of your money.
If you choose optimized CPM, this is controlled by Facebook based on what their algorithms have determined to be fair in driving actions to a page, and this option can often get very expensive, so I do not recommend using this feature.
Approval Process
Once your ad is submitted, it will take up to 24 hours to be reviewed and approved. I strongly suggest taking a look at the Facebook Advertising Guidelines before you submit your ad campaign to make sure it complies with all the regulations.
Hopefully this will get your brand page started with its first Facebook advertisement. Look out for my next post where I’ll show you some advanced strategies to maximize the ROI of your campaign.

